Your smartphone. That sleek device in your pocket, always within reach, isn't just for calls and texts anymore. It's a remarkably capable camera and video recorder, a gateway to crafting stunning visual stories. Forget bulky DSLRs and complex setups; the revolution of Mobile Photography & Videography has democratized content creation, putting professional-grade tools right in your hand.
Whether you're capturing life's fleeting moments, documenting your travels, or building a brand, your phone offers immense creative potential. But unlocking that potential goes beyond just pointing and shooting. It requires understanding the fundamentals, mastering your device's hidden powers, and adopting a creative mindset.
At a Glance: Key Takeaways for Mobile Creators
- Light is Everything: Prioritize natural light, understand its direction, and avoid harsh, direct flashes.
- Stay Steady: Use both hands, brace your elbows, and invest in a tripod or gimbal for smooth, professional-looking shots.
- Get Closer Physically: Avoid digital zoom at all costs; walk toward your subject to maintain image quality.
- Take Manual Control: Override automatic settings to precisely set focus and exposure for sharp, well-lit results.
- Audio Matters: Even for video, good sound makes a huge difference; consider external microphones.
- Edit Like a Pro: Mobile editing apps are powerful tools to refine your photos and videos, adding polish and storytelling flair.
- Shoot Landscape for Video: Always hold your phone horizontally for a cinematic, TV-friendly aspect ratio.
The Smartphone Revolution: Your Pocket-Sized Production Studio
Not long ago, capturing high-quality photos and videos meant investing in expensive cameras, lenses, and editing software. Today, the smartphone has flipped that script. Advanced sensors, computational photography, and powerful processors combine to deliver incredible image and video fidelity, often rivalling traditional cameras in everyday scenarios. From the bustling streets of Dubai, where elite videographers are pushing the boundaries, to independent content creators worldwide, smartphones are proving to be versatile, powerful, and undeniably convenient tools for visual storytelling.
This guide isn't about buying the latest gadget (though new phones are impressive!). It's about maximizing what you already have, understanding the core principles that elevate any capture, and transforming your casual snaps into captivating visual narratives.
Building Your Visual Foundation: Essential Principles for Any Shot
Before diving into specific settings, let's nail the timeless truths of compelling imagery and footage.
Mastering Light: Your Most Powerful Tool
Light isn't just what illuminates your subject; it shapes your image, dictates mood, and reveals texture. Many beginners underestimate its power, but experienced creators, including those elite videographers in Dubai, know it’s paramount.
- Embrace Natural Light: Sunlight is your best friend. Position your subject so the main light source (like a window or the sun) is facing them, not behind them. This avoids harsh shadows and ensures your subject is well-lit.
- Avoid Direct Flash: While your phone has an LED flash, relying on it often results in flat, harsh lighting, unnatural skin tones, and red-eye. Instead, seek out ambient light or consider using a small, portable LED light source for a softer, more controlled glow, especially when shooting at night.
- Beware of Backlighting: Shooting directly into a strong light source (like a window or the sun) will silhouette your subject, often obscuring crucial details. If you want a silhouette, that's great! But if not, reposition yourself or your subject. If you can't move, use your phone's manual exposure control (more on this later) to brighten your subject, or introduce a "fill light" from the front.
- Soft vs. Hard Light: Overcast days produce soft, diffused light, which is incredibly flattering for portraits. Bright, sunny days create hard light with strong shadows, which can be dramatic but also challenging. Learn to work with what you have or modify it with reflectors (even a white piece of paper works!).
Steady Hands & Smooth Shots: The Art of Stability
Shaky footage or blurry photos immediately scream "amateur." Stability is non-negotiable for professional-looking results.
- Your Body as a Stabilizer: When holding your phone, use both hands, tuck your elbows close to your body, and stand with your feet shoulder-width apart. This creates a more stable base, minimizing unintentional movements. For very low shots, you can even sit down and brace your arms on your knees.
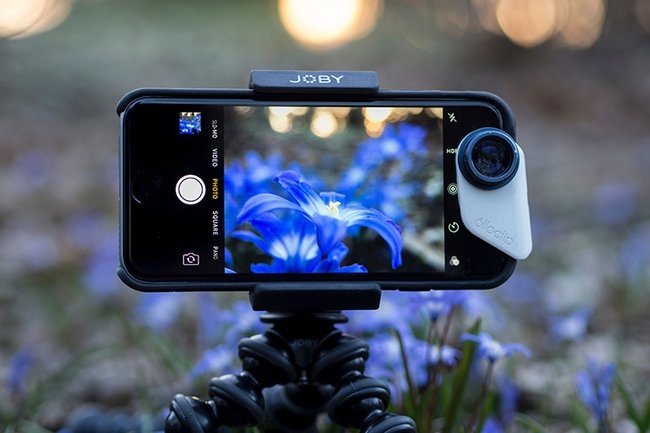
- The Indispensable Tripod: For truly steady photos and videos, especially in low light or for time-lapses, a tripod is your best friend. Look for a compact, flexible tripod designed for smartphones, complete with an adapter clip that securely holds your device. This eliminates jitter and shake, ensuring clear and visually appealing footage.
- Gimbals for Cinematic Motion: If you're serious about smooth, flowing video—think tracking shots or dynamic pans—a smartphone gimbal is a game-changer. These motorized stabilizers counteract your movements, delivering buttery-smooth cinematic results that are hard to achieve handheld.
Composition Rules: Framing Your Masterpiece
Composition is how you arrange elements within your frame. It guides the viewer's eye and adds visual appeal.
- Shoot in Landscape, Not Portrait (for video!): This is a cardinal rule for videography. Those annoying black bars on the sides of your video occur because it was shot vertically. Always hold your phone horizontally (landscape orientation) when recording video. This fills the screen on widescreen devices like TVs and computers, providing a professional, cinematic look. For photography, portrait orientation is perfectly fine and often preferred for subjects like people or tall buildings.
- The Rule of Thirds: Imagine a tic-tac-toe grid over your screen. Place your subject or key compositional elements along these lines or at their intersections. This creates more balanced and engaging photos and videos than simply centering everything. Most phone cameras have a grid overlay you can enable in settings to help you visualize this.
- Leading Lines: Use natural lines in your environment (roads, fences, rivers, architectural elements) to lead the viewer's eye towards your subject or a point of interest.
- Symmetry and Patterns: Humans are drawn to order. Look for symmetrical scenes or repeating patterns to create visually striking compositions.
- Foreground, Middle Ground, Background: Create depth in your shots by including interesting elements in the foreground, your main subject in the middle, and a relevant background.
Getting Closer, Not Zooming In: Preserving Quality
This is a critical distinction that can make or break your image quality.
- Avoid Digital Zoom: Your phone's digital zoom doesn't actually magnify the image with optics. It simply crops into your existing shot and then "blows up" those pixels, resulting in a grainy, pixelated, and low-quality image. It’s like cropping a photo before you take it.
- Get Physically Close: The best way to get a tighter shot without sacrificing clarity is to literally walk closer to your subject. This maintains the high-resolution quality of your phone's sensor.
- Optical Zoom is Your Friend: Some high-end smartphones now feature dedicated telephoto lenses, offering true optical zoom. This works like a traditional camera lens, physically magnifying the image before it hits the sensor, thus preserving image quality even when zoomed in. If your phone has an optical zoom lens (often indicated by a 2x or 3x icon), use that instead of digital zoom.
Unlocking Your Camera's Advanced Features
Your smartphone camera app is more powerful than you might think, offering a range of settings that move beyond simple automation.
Taking Manual Control: Focus and Exposure Unleashed
Relying solely on automatic settings means your phone decides what's important, and it's not always right. Manual control gives you the power to tell your story.
- Tap to Focus and Expose: Most camera apps allow you to tap on your subject to set both the focus and exposure. The phone will then adjust to make that tapped area sharp and properly lit. This is crucial for ensuring your subject isn't blurry or underexposed (too dark) or overexposed (too bright).
- Locking AE/AF: After you tap to focus, often a small square or circle appears, sometimes with a sun icon or slider. Hold your finger down on that area, and many phones will "lock" the auto-exposure (AE) and auto-focus (AF). This is invaluable when your subject is moving, or you're recomposing your shot after setting the focus.
- Exposure Compensation: Once you've tapped to set exposure, you'll often see a slider next to the focus square (usually a sun icon). Dragging this up or down allows you to manually brighten or darken the image, overriding the automatic exposure to achieve your desired look.
- Pro Mode (Manual Settings): Dive into your phone's "Pro Mode" or "Manual Mode" (if available). Here, you can often control:
- ISO: Your camera's sensitivity to light. Lower ISO for bright conditions (less noise), higher ISO for low light (more noise).
- Shutter Speed: How long the sensor is exposed to light. Fast shutter speeds freeze action; slow shutter speeds create motion blur (e.g., for silky water or light trails).
- White Balance: Adjusts the color temperature of your image to make whites appear white, correcting for different light sources (e.g., warm indoor lights vs. cool daylight).
- Aperture (sometimes simulated): Controls depth of field (how much of the image is in focus). While true aperture control is rare on phones, modes like "Portrait Mode" simulate it digitally.
To truly master these settings and understand how they work together, it's worth checking out your guide to mode mobile, which often delves into accessing and utilizing these advanced camera features within your specific device.
Beyond the Standard Shot: Creative Modes
Your phone is packed with specialized modes designed to add flair and unique perspectives.
- Slow Motion & Time-Lapse Wisely: Your phone's built-in slow-motion feature is fantastic for capturing fast-paced action (like a splash of water or a pet mid-jump) and revealing details imperceptible to the naked eye. Time-lapse, conversely, condenses long periods (a sunrise, clouds moving) into short, dynamic videos. Use these tools thoughtfully; don't overdo them, or they might detract from your video's essence.
- Portrait Mode (Bokeh Effect): This popular mode uses computational photography to simulate a shallow depth of field, blurring the background (bokeh) while keeping your subject sharp. It's excellent for isolating subjects and creating a professional, artistic look. Experiment with how much blur you apply.
- Night Mode: Many modern smartphones excel in low light thanks to Night Mode. This mode captures multiple frames over a few seconds and then stitches them together, reducing noise and enhancing detail and brightness in dark environments. Hold your phone as still as possible for the best results.
- Panorama: Stitch together a wide vista by slowly panning your camera. Great for landscapes and large group photos where a single shot isn't enough.
- Burst Mode: Hold down the shutter button to rapidly take a series of photos. Ideal for capturing fast-moving subjects (kids, sports) and then selecting the perfect frame.
Elevating Your Audio: Sound as Important as Sight
For videography, good audio is often more important than stunning visuals. Poor audio can instantly undermine an otherwise great video.
- Internal Mic Limitations: While smartphone microphones have improved significantly, they're typically omnidirectional, meaning they pick up sound from all directions. This is fine for close-range dialogue in quiet environments, but they struggle with background noise, wind, and subjects further away.
- External Microphones are Key: To truly enhance your audio quality, invest in external mics.
- Lavalier (Lapel) Mics: Small, clip-on microphones ideal for capturing clear dialogue from a single person, minimizing ambient noise. Available in wired or wireless (Bluetooth) versions.
- Shotgun Mics: Directional microphones that focus on sound directly in front of them, rejecting noise from the sides and rear. Great for interviews or capturing specific sounds.
- Wireless Systems: For more advanced setups, wireless transmitters and receivers offer freedom of movement and high-quality audio.
- Minimize Background Noise: When recording, try to find the quietest possible location. Turn off air conditioners, fans, and close windows. Consider putting your phone on "Do Not Disturb" to avoid notification sounds ruining a take.
Essential Gear & Setup for Mobile Creators
While the "best camera is the one you have with you," a few thoughtful accessories can significantly elevate your mobile photography and videography game.
Must-Have Accessories
- Smartphone Tripod & Mount: As discussed, essential for stability, long exposures, and time-lapses.
- External Microphone: Crucial for crisp, clear audio in videos. Choose based on your needs: lavalier for interviews, shotgun for focused sound.
- Portable LED Lights: Small, battery-powered LED panels provide controllable, soft light, perfect for filling shadows or adding accent lighting.
- Clip-on Lenses: Expand your phone's optical capabilities. You can find macro lenses for extreme close-ups, wide-angle lenses for broader scenes, and even telephoto lenses for distant subjects.
- Power Bank (Portable Charger): Shooting photos and especially video drains your phone's battery quickly. A power bank is a lifesaver, ensuring you don't miss a moment.
- Smartphone Gimbal: For fluid, cinematic video motion without the jitters.
Setting Up Your Shot for Success
- Clean Your Lens! This is surprisingly overlooked. Fingerprints and dust on your phone's tiny lens can significantly degrade image quality, causing haziness or flare. A quick wipe with a microfiber cloth before shooting is a habit every pro adopts.
- Disable Notifications: A text message or incoming call vibration can ruin a video take or cause blur in a long-exposure photo. Put your phone on "Do Not Disturb" or airplane mode when shooting.
- Check Storage and Battery: Nothing is more frustrating than running out of battery or storage space in the middle of an epic shoot. Always start with a full charge and ensure you have ample free space.
- Consider a Grid Overlay: Enable the grid lines in your camera app settings to help with composition (like the Rule of Thirds).
The Post-Production Powerhouse: Editing on Mobile
Capturing the image is only half the battle. Editing is where you refine, enhance, and truly tell your story. And the best part? You can do it all right on your mobile phone, transforming good footage into exceptional pieces of art, as emphasized by many expert videographers.
The Magic of Editing: From Good to Great
- Trimming & Cutting: Remove unnecessary segments, tighten up pacing, and focus on the most impactful moments. This is foundational for any video.
- Seamless Transitions: Move smoothly between clips with subtle transitions, avoiding jarring cuts.
- Color Grading & Correction: Adjust brightness, contrast, saturation, and color temperature to give your photos and videos a consistent look and feel. This can set the mood and make your visuals pop.
- Adding Music & Sound Effects: Music is a powerful emotional driver for video. Choose royalty-free tracks that complement your visuals. Sound effects can add realism or emphasis.
- Titles & Text Overlays: Introduce your video, add captions, or highlight key information with stylish text.
Top Mobile Editing Apps
The app stores are brimming with powerful editing tools. Here are a few popular choices:
- For Photography:
- Adobe Lightroom Mobile: Professional-grade tools for color correction, exposure adjustments, selective edits, and preset application.
- Snapseed: A Google-owned app offering a comprehensive set of tools, including selective adjustments, healing, and creative filters, all in an intuitive interface.
- VSCO: Known for its iconic film-like filters and community features.
- For Videography:
- CapCut: Incredibly popular, user-friendly, and feature-rich for short-form video editing, transitions, effects, and music.
- DaVinci Resolve (iPad/tablet): A professional desktop video editing suite now available on some mobile devices, offering advanced color grading and editing capabilities.
- KineMaster: A robust full-featured video editor with multi-track editing, precise trimming, and a wide array of effects.
- LumaFusion (iOS): Considered one of the most powerful professional video editing apps for mobile, offering multi-track editing, advanced audio controls, and extensive export options.
Embracing the power of editing is your final step in elevating your mobile creations. With the right tools and a creative eye, your smartphone becomes a truly comprehensive creative ally, allowing your storytelling prowess to shine through.
Common Pitfalls & How to Avoid Them
Even with the best intentions, it's easy to fall into common traps. Being aware of these will help you steer clear.
- The Vertical Video Trap: We've said it before, but it bears repeating for video: always shoot horizontally (landscape). Vertical videos look unprofessional on most viewing platforms (TVs, YouTube, desktop computers), leading to those unsightly black bars.
- Over-Editing: While editing is crucial, don't go overboard with filters, effects, or heavy color grading. The goal is to enhance, not distract or make your footage look unnatural. Less is often more.
- Ignoring Audio for Video: Many creators focus solely on visuals. But terrible audio (wind noise, muffled voices, distracting background sounds) will make viewers click away faster than blurry video. Prioritize clear sound.
- Running Out of Storage/Battery: This is preventable! Always check your phone's battery and storage before a significant shoot. Clear out old files or unnecessary apps if needed.
- Chasing the "Perfect" Shot: Sometimes, the best shot is the one that captures the genuine moment, even if it's not technically flawless. Don't let perfection be the enemy of good, authentic storytelling.
Your Next Steps: From Casual Shooter to Confident Creator
You now have a robust toolkit of principles and techniques for mastering Mobile Photography & Videography. But knowledge without practice is just information.
- Practice Consistently: The more you shoot, the better you'll become. Experiment with different light, compositions, and subjects every day.
- Experiment with Different Styles: Try street photography, portraits, landscapes, candid moments, short documentaries, or vlogs. Find what excites you.
- Learn from Others: Watch tutorials, follow mobile photographers and videographers you admire, and analyze what makes their work compelling.
- Share Your Work & Get Feedback: Post your creations online. Constructive criticism can be invaluable for growth.
- Focus on Storytelling: Beyond technical skills, think about the narrative you want to convey. What emotions do you want to evoke? What message do you want to send?
- Don't Fear Your "Pro" Settings: Delve into your camera app's manual controls. It might feel intimidating at first, but adjusting ISO, shutter speed, and white balance will give you immense creative power.
Your smartphone is more than just a communication device; it's a powerful instrument for creative expression. Embrace this journey, explore your potential, and let your unique perspective shine through every photo and video you capture. The world is waiting to see through your lens.